How to send an Email
Directus has the ability to send emails using Flows. This can be any address, not just for users within your project. This article will show you how to configure your workflows to send emails to a list of recipients.
To send a email, you will need a workflow in Flows with a trigger. Then create the action "Send an Email" and add the recipient(s). Finally, compose the email and save your workflow.
Email is a widely accepted communication tool in the workplace but they can easily become overwhelming or lost in a busy mailbox. So the first question to ask is Do I really need this? and if so, when is the best time in the workflow to send this?
Directus Flows can help. You can introduce intelligent routing to send emails at specific points in your workflow and ensure the message is sent at the right moment. This is where the status field comes in.
A status field can hold as many states as you require and is the perfect parameter to use to target email notifications. Let's create a basic workflow using the status field to filter submissions.
Step 1: Recipients
To send emails, you will need to have recipients. Make note in a seperate text document (to copy from later) all the recipients that will be included in this workflow. In a business setting, consider using a shared mailbox or mailing list to ensure new staff are included without having to update the Flow.
Step 2: Create a Trigger
To begin, click on the cog icon to open the settings, then click Flows. Create a new flow to open the trigger options window.
Name the flow accordingly and move onto the Trigger Setup. I'm wanting to use a trigger from within Directus so I'll use an Event Hook.
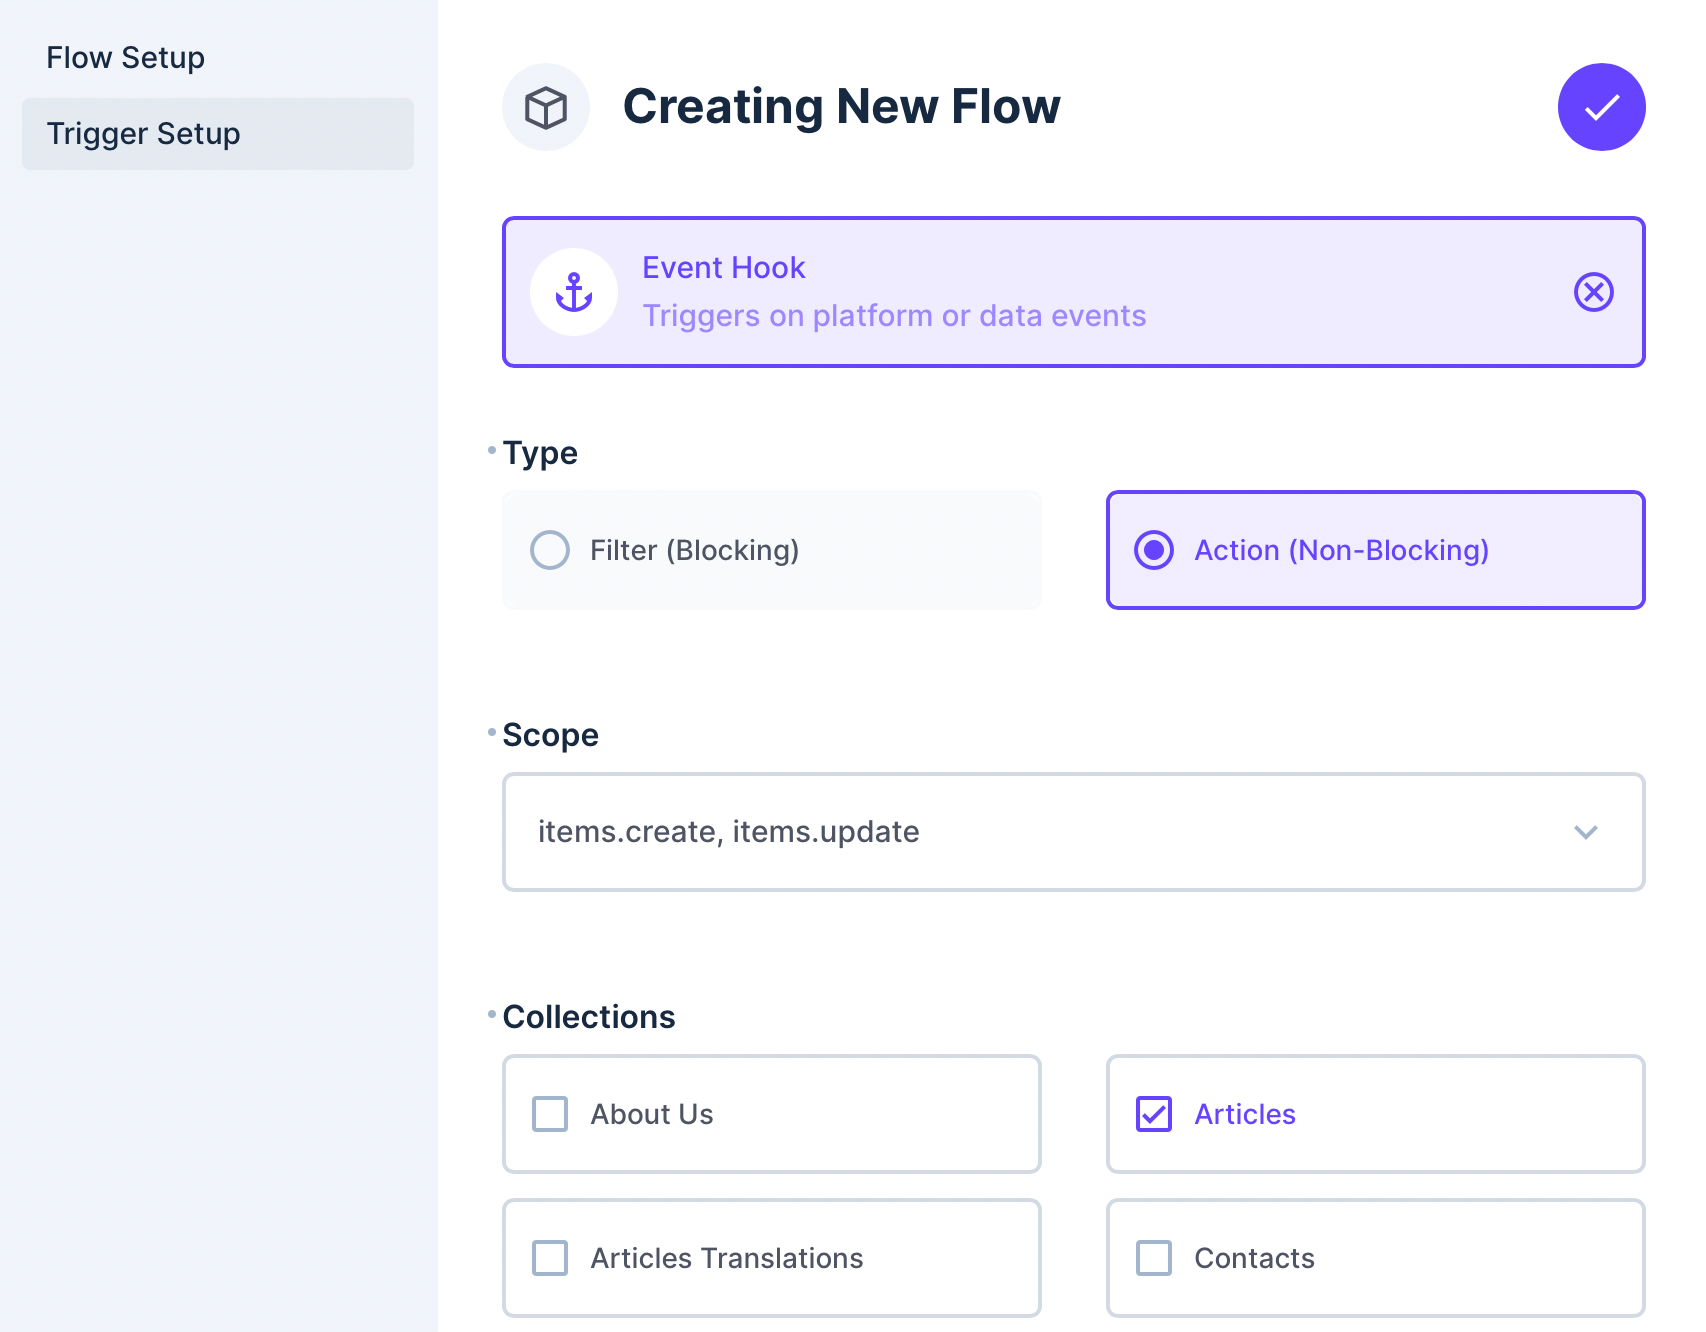
I've chosen to set the scope to items.create and items.update to capture all events when something is created or updated in my chosen collection(s).
Now I have my canvas for creating my workflow.

Step 3: Filters
Next, use a filter for the incoming events to bring context to the workflow. For this example, I'm wanting to email my recipients when a record is requesting approval. I will use a status that I created called "Request Approval".
Click the (+) and choose Condition. Give it a memorable name and create a filter on the $trigger.payload.status.
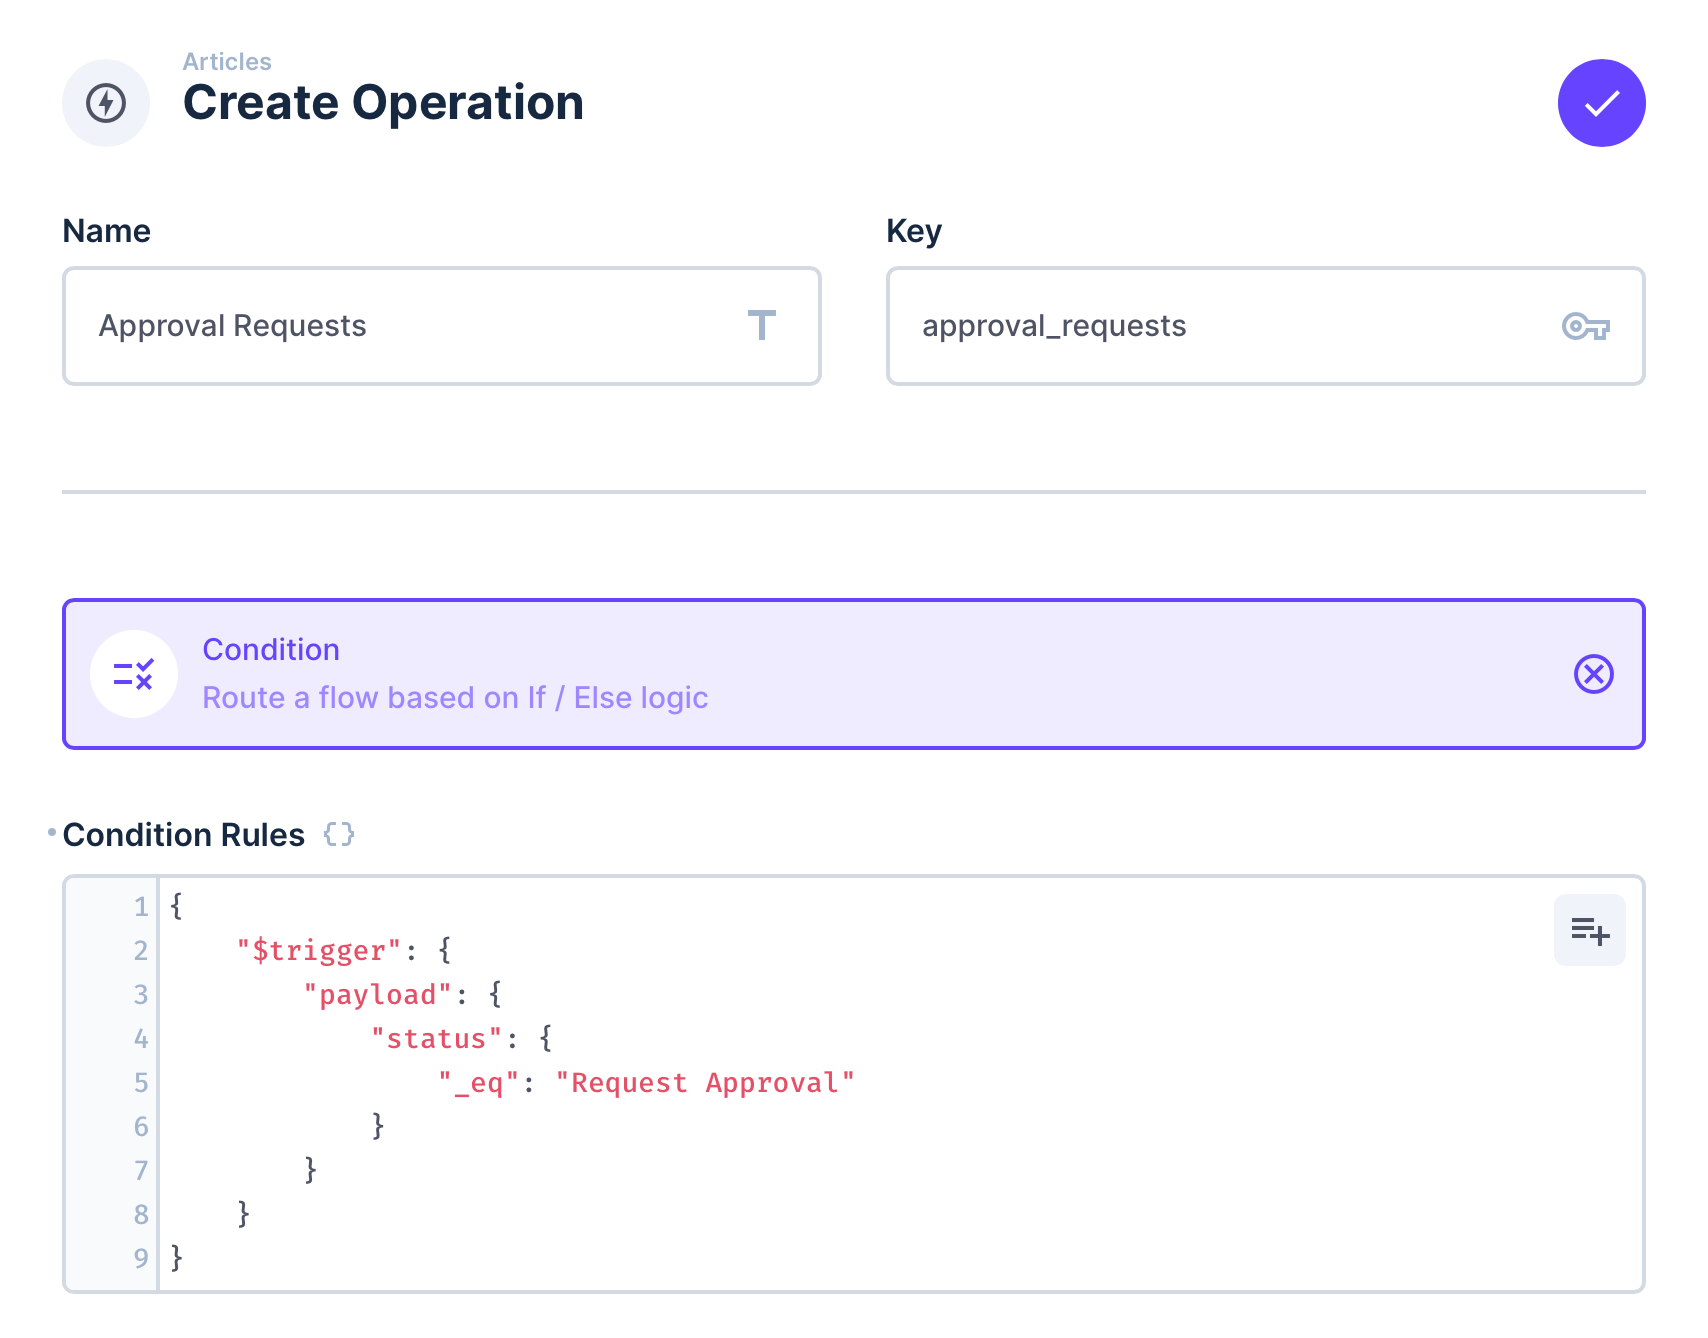
In the example above, you'll see I've included the status field is in the payload as a filter. If the payload does not contain the status, or the status is not "Request Approval" then the false route will be taken. This is the code to use in the Condition Rules.
{
    "$trigger": {
        "payload": {
            "status": {
                "_eq": "Request Approval"
            }
        }
    }
}
The $trigger parameter contains the payload, collection and key as the item ID (or keys as a list of item ID when triggered by items.update). The payload will only contain the fields submitted when saving the record.
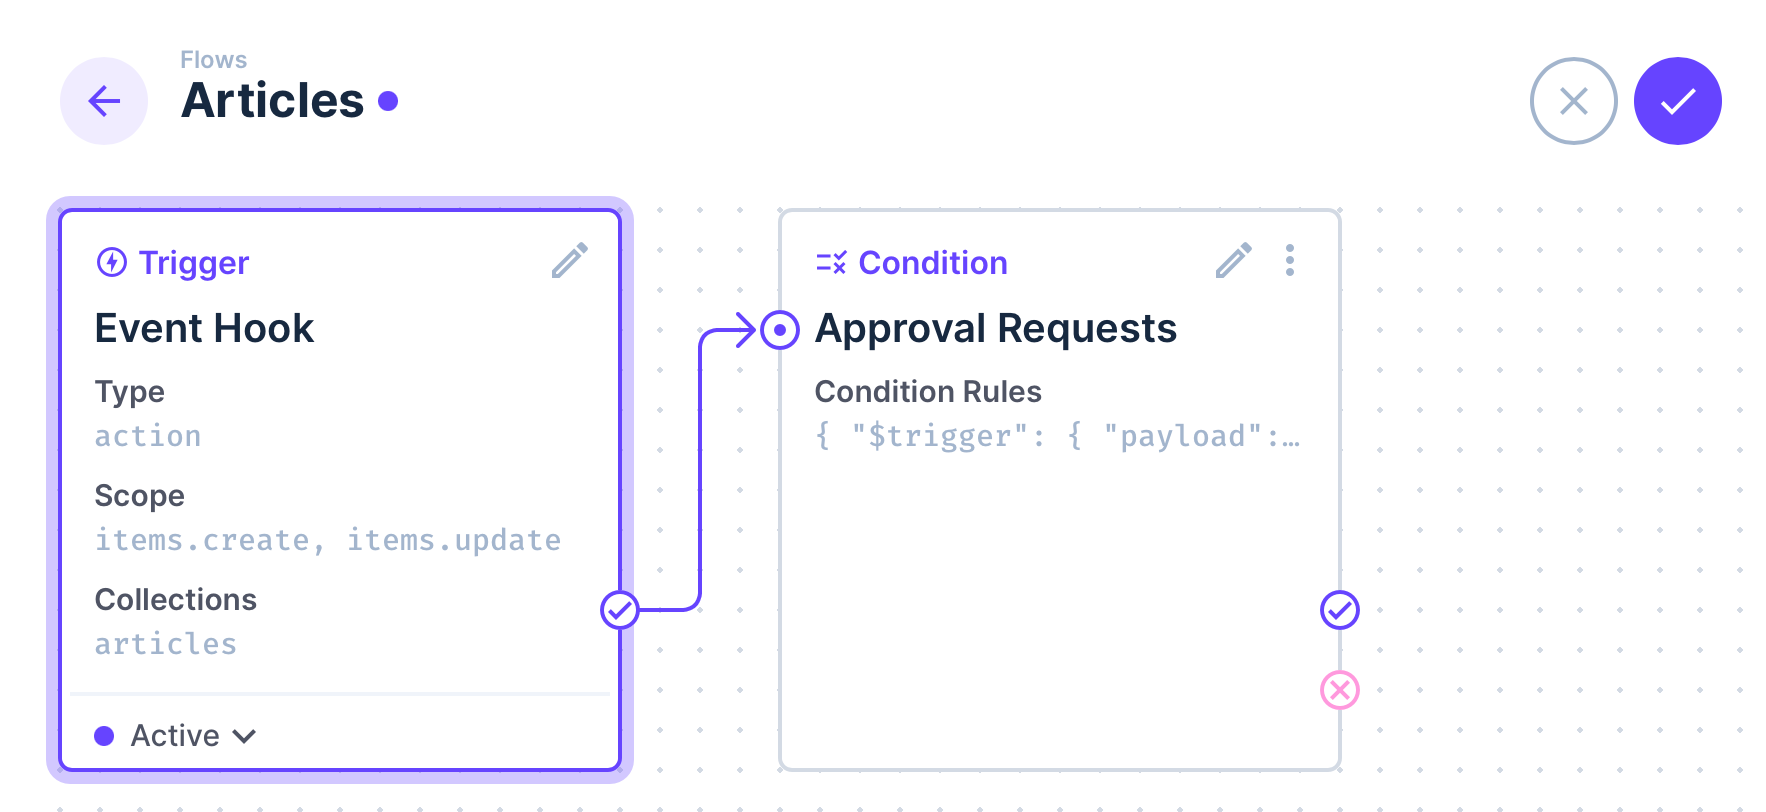
Now the condition is in place. You'll notice there is now a Tick and Cross attached to this card. The tick is the positive/true response route and the cross is the negative/false route.
Step 4: Send the Email
Click the tick to create a new step in the workflow and choose Send Email from the list of options.
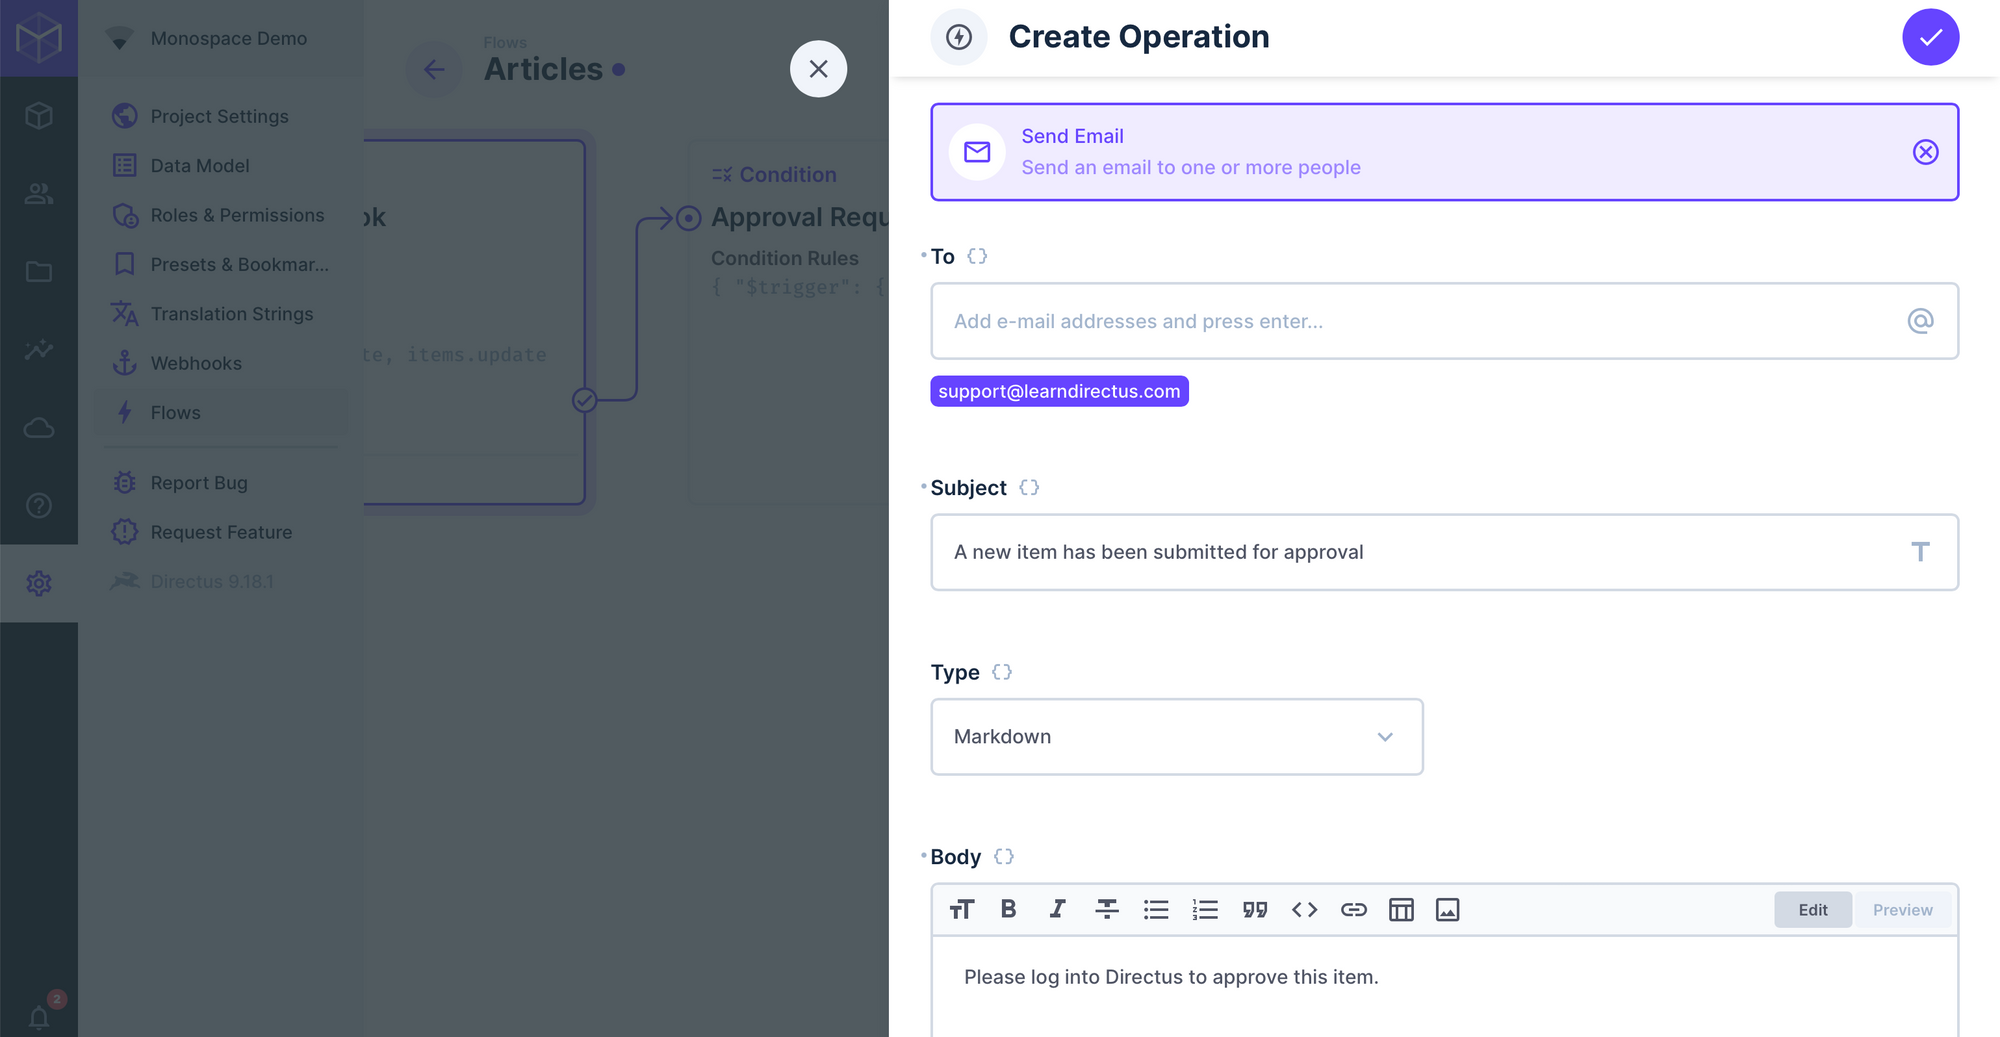
Add recipients by typing the email address into the To field and pressing Enter. Multiple recipients can be added and will be listed as purple buttons below the input field.
Add a Subject and Body to the email and Save the changes.
That's it. Save the workflow and give it a go. Here is an example of the email sent from the workflow to my gmail address.
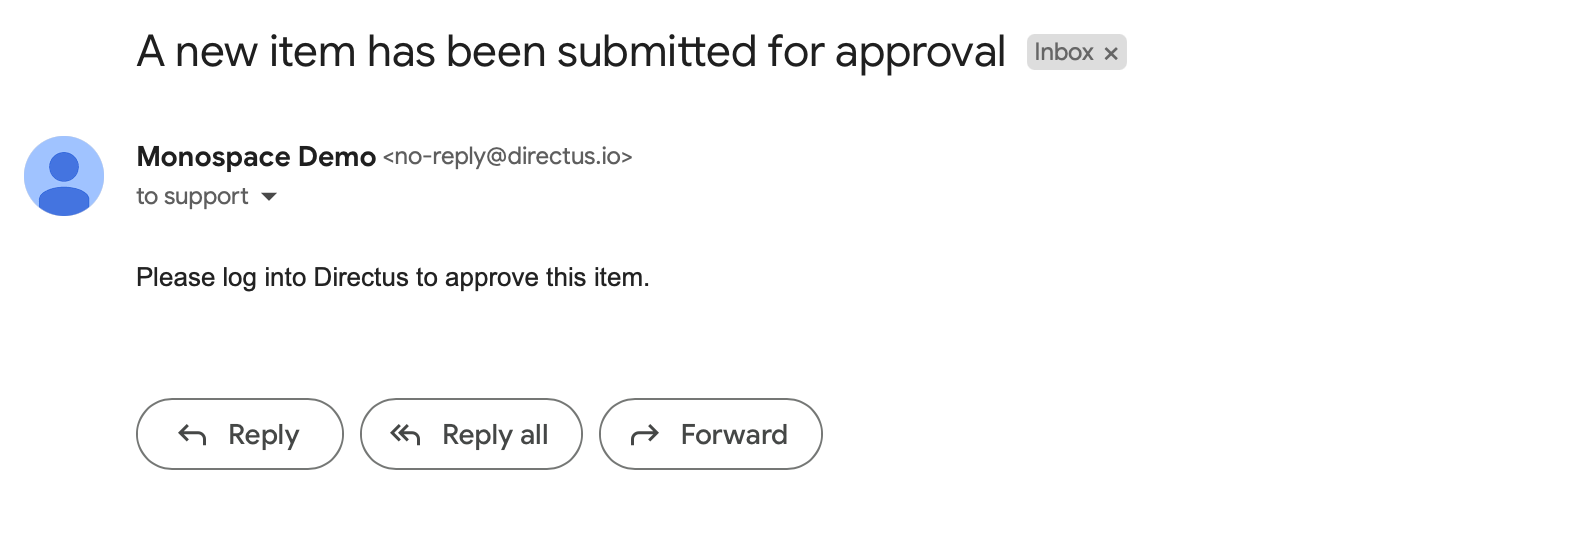
The From address for cloud projects will be the name of your project and the email address [email protected]. Premium plans use a dedicated server and will allow you to set a branded email address to use.
Conclusion
In this article I have demonstrated how to create a workflow using Flows to send emails to any address. This can be repeated for any other collections or you can include multiple collections in your trigger if relevant. There is the temptation to expand the workflow to include more information such as links, names, content etc. This is possible but can be difficult to maintain with diverse data. Simplicity is best.