Image Optimization in Directus
Directus can serve images on a website from the file library using the asset URL, however, if these images are too large, it will impact the performance of both your web application and Directus itself. This article will cover how you can optimize images using the assets API.
Images can be optimized by utilizing the following parameters: width, height, format and qualtiy. Include these parameters at the end of the asset URL to reduce how much data that needs to transfer.
To optimize an image, the goal is to reduce the file size as much as possible and still look good. First let's look at the width and height of image.
Width and Height
Generally a digital photo will be a lot bigger than we need for a web asset. A quick win is to set the width parameter to the width of the web asset. The height will be automatically calculated. The same can be done in reverse by only setting the height.
/assets/<Image-ID>?width=600
/assets/<Image-ID>?height=600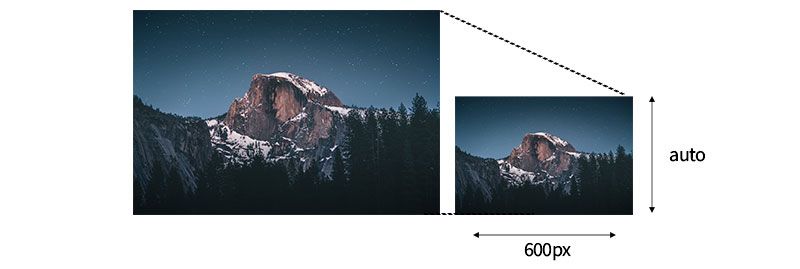
If you are wanting to restrict the image to a set width and height, you'll want to define the fit parameter. This will define whether or not to crop the image.
/assets/<Image-ID>?width=600&height=600&fit=cover
/assets/<Image-ID>?width=600&height=600&fit=contain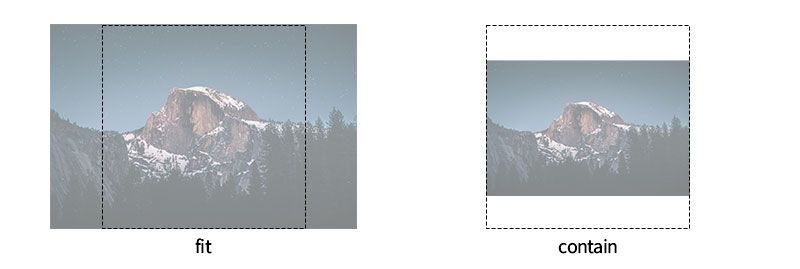
Now that the image size is smaller, the file size will be smaller too. Next, lets look at the image format.
Image Format
Google developed the image format WebP which is now widely supported across all browsers. It produces better quality images for a fraction of the size. WebP also supports transparency. To use WebP, set the format to equal webp.
/assets/<Image-ID>?width=600&height=400&fit=cover&format=webp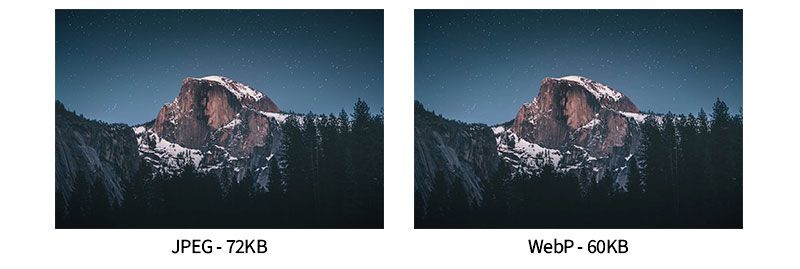
Alternatively you can set the image to JPEG for photos or PNG for graphics.
/assets/<Image-ID>?width=600&height=400&fit=cover&format=jpg
/assets/<Image-ID>?width=600&height=400&fit=cover&format=png
If you prefer to keep the image in the original format, exclude the format parameter. Next lets look a the qualtiy.
Image Quality
Setting the image quality between 0 - 100 will help reduce the file size. 100 being the maximum quality and 0 being the worst. I find 75 - 80 is a happy medium.
/assets/<Image-ID>?width=600&height=600&fit=cover&format=webp&quality=75
Conclusion
The combination of these parameters will optimize your images and drastically improve the performance of your web applications.