How to export data to JSON in Directus
Directus has a powerful export functions that puts you in control over your data. Choose what fields to include and filter the records to your needs. In this article I will cover how to exports you data to a JSON file.
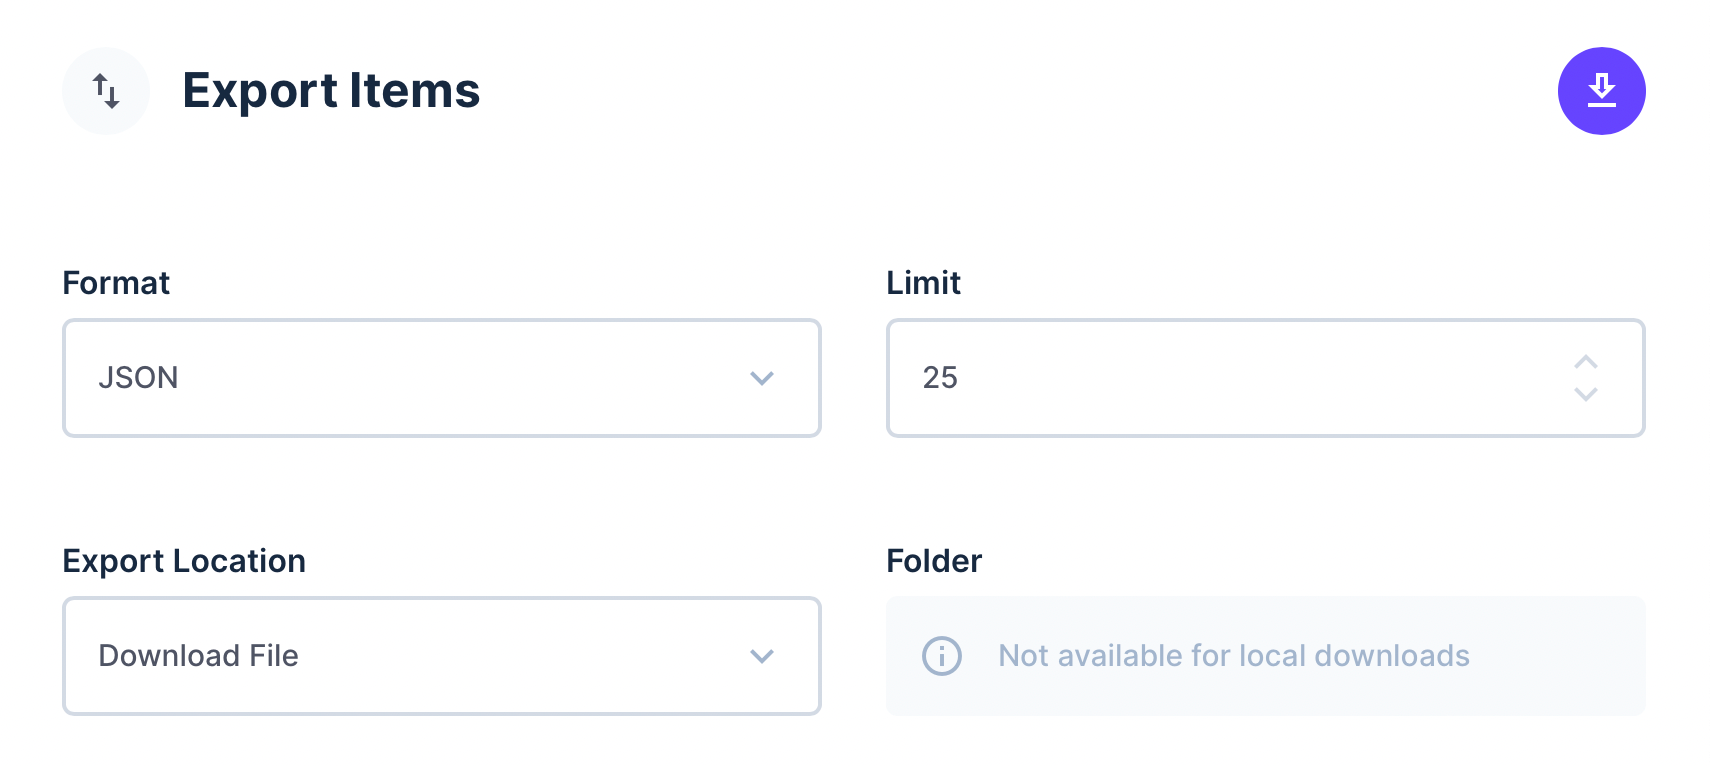
To export your data to a JSON file, open your collection in Directus and use the right-side toolbar to click Import / Export. Click Export Items to bring up the options. Set the Format to JSON and number of rows to limit, then click the Download button in the corner.
Step 1: Open the Import / Export section
The Import / Export section lives in the right side bar and directly relates to the collection you have open. Switching between collection while this is open will change the data source to the active collection.

Click the Export Items button to open the export options dialog.
Step 2: Select your Export Options
Once the dialog is open, make sure the Format is set to JSON. By default, the output file is downloaded to your device however you can change this to save within your Directus File Library.
There is a lot more to the data export feature. Here are some useful options to keep in mind.
Sorting
You can choose a field and direction to sort your data for the output.

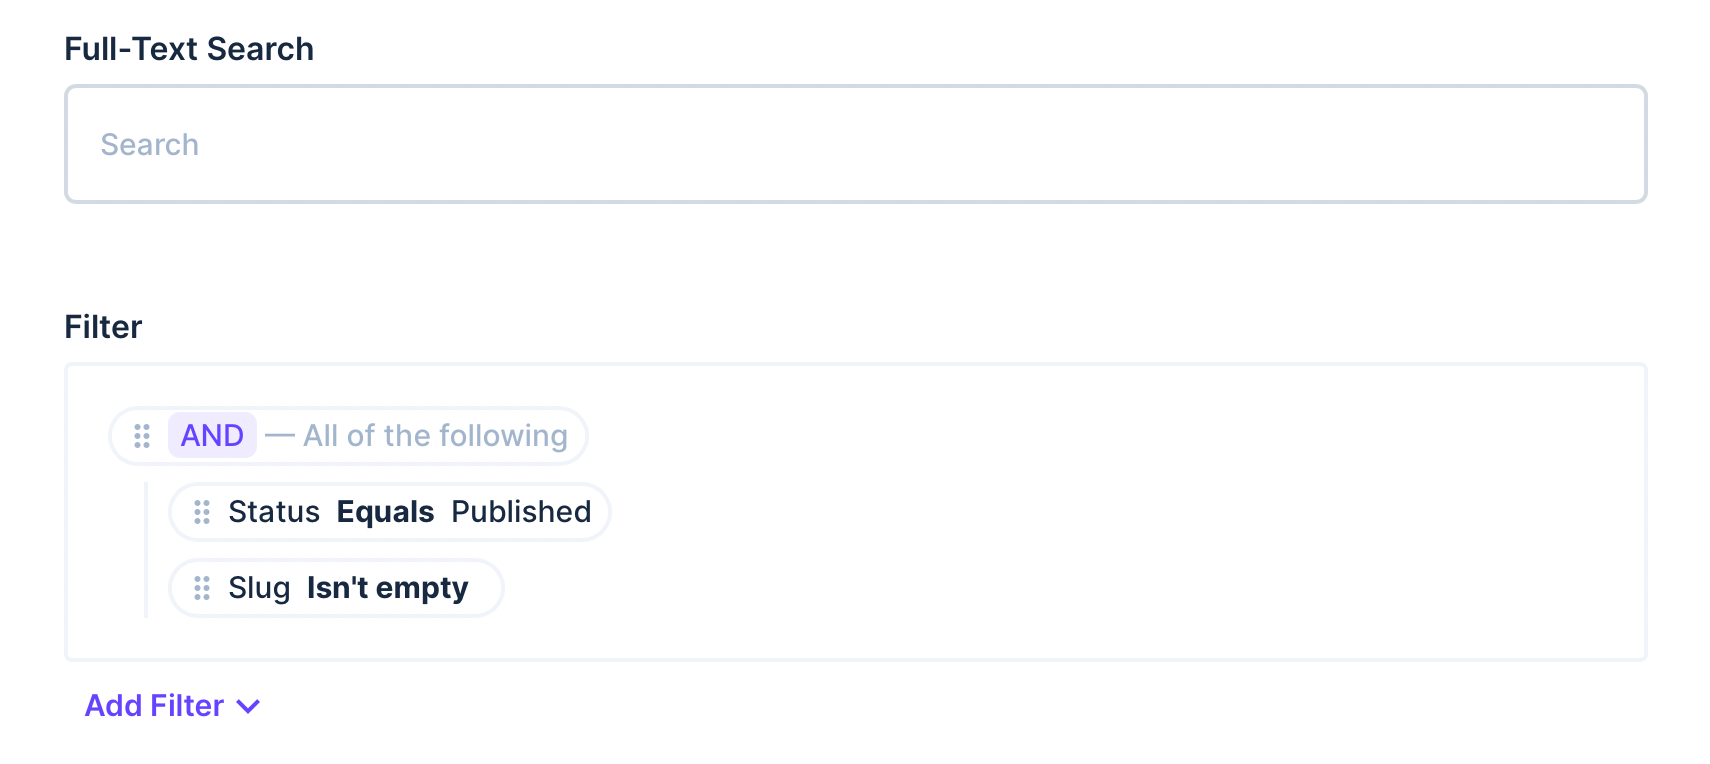
Filters and Search Term
You can use filters and search terms to remove any unwanted data such as archived items or orphened content. Or maybe you'd like to clean your database, this would be useful to backup any data that you wish to delete.
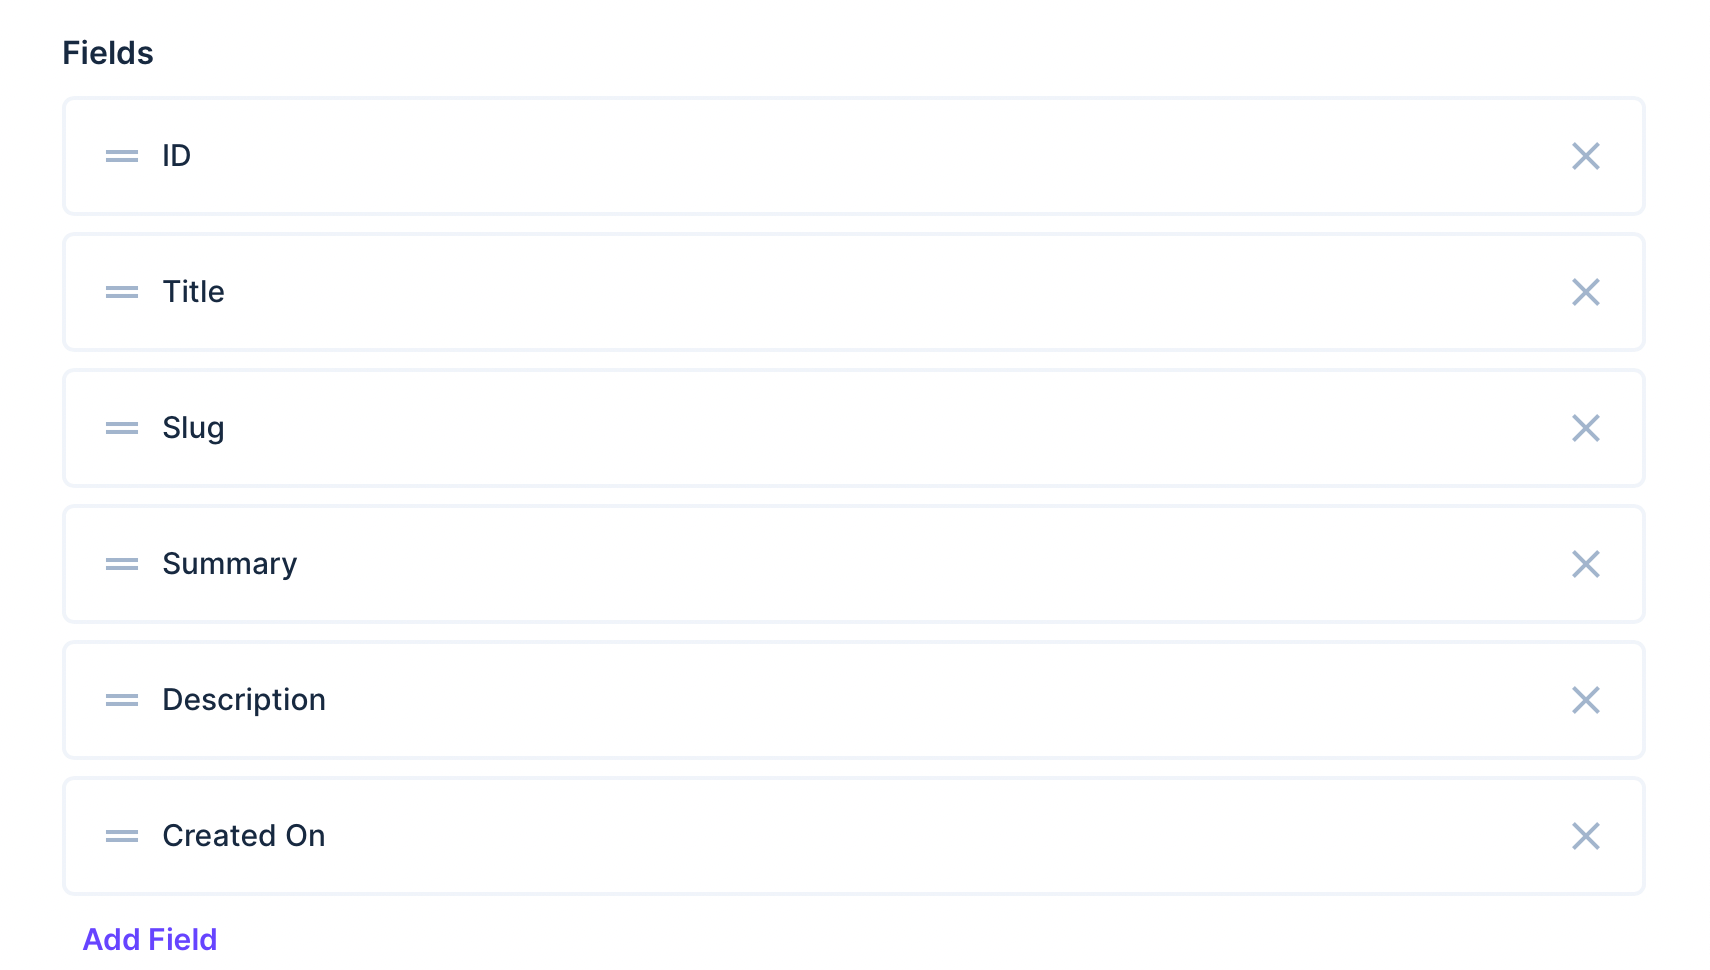
Included Fields
You can choose to include or exclude any fields using the list at the bottom. Simply click the X on the field or use the Add Field option to add more. You can also drag and drop the fields into the desired order.
Step 3: Download your file
At the top of the page, click the download button (Arrow pointing downwards at a horizontal line). This will query your data using the defined parameters and compile the results into a JSON file. Your browser will receive the file and download it to your dedicated downloads folder.
Conclusion
Now you know how you can export data but did you know you can import data as well? Check out this article to find out how.